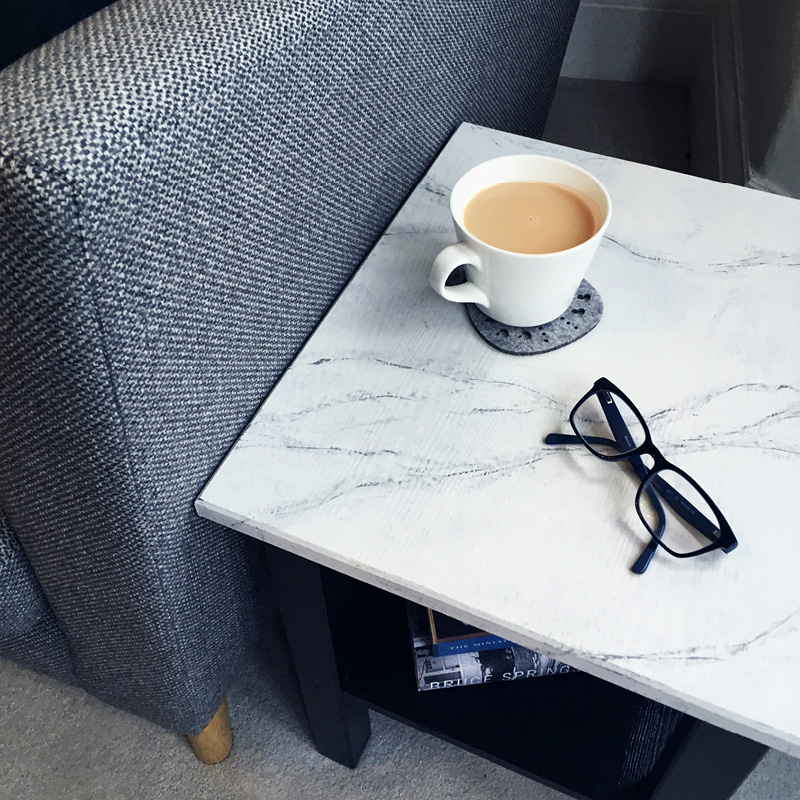
How to create a faux Marble Table
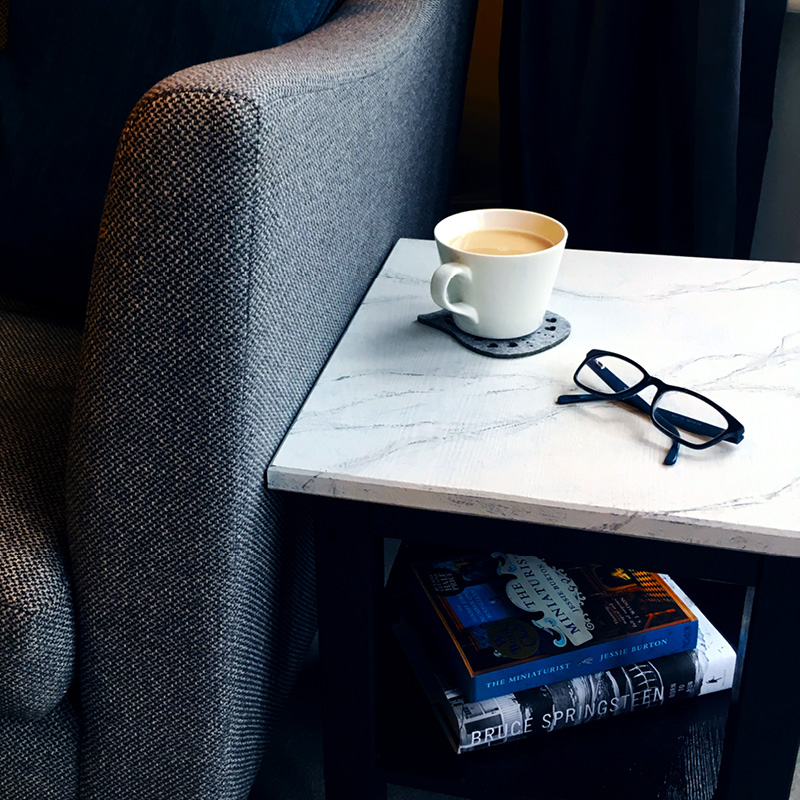
All Round Creative Junkie, Cheryl Lumley has gone marble mad with this beautiful faux effect table upcycle!
“I’ve been upcycling and furniture hacking ever since I moved into my first flat 20 years ago. As a way to save money, as we didn’t have much, I bought basic IKEA furniture, salvaged chairs from skips, used broom shanks as curtain poles and made all my large mirrors from salvaged wood.
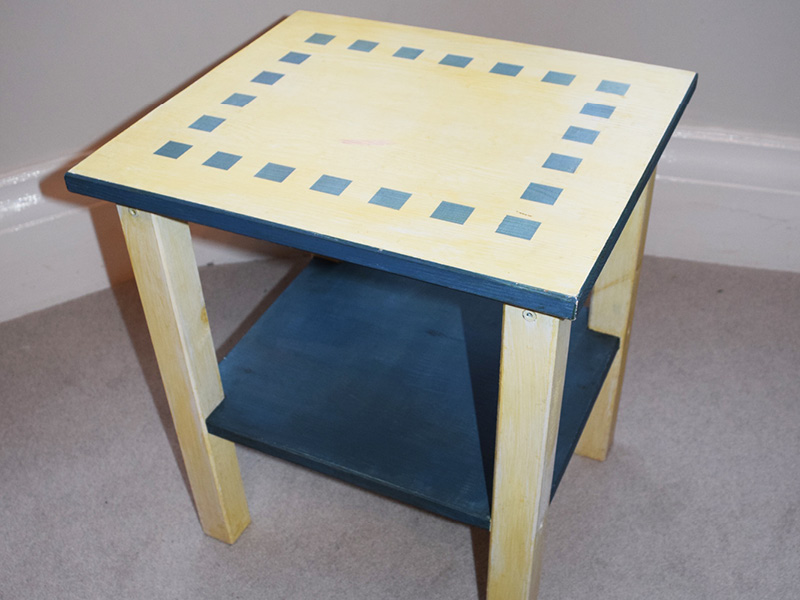
This IKEA table was one of the first pieces I painted, I think I was having a Rennie Mackintosh moment with the blue squares! Having been in my loft for the last 12 years since moving house, I thought it was time for a revamp. After my success with marbling on the Marble Trinket Dishes, I wanted to try a different technique and create a marble table top.
There were quite a few steps involved but it wasn’t too difficult, it’s about building up the layers to give a true marble effect. I used a fine artists brush for the marble veins but you can also use a feather if you have one. I was tempted to put more lines on but restrained myself and went for a less is more look.”
What you will need
- Small wooden table
- Rust-Oleum Chalky Finish Furniture Paint in Winter Grey
- Rust-Oleum Chalky Finish Furniture Paint in Graphite
- Rust-Oleum Satin Finish Furniture Paint in Carbon
- Rust-Oleum Furniture Lacquer
- Paint brushes (including small artists brush for the marbling details)
- Water spray bottle
- Kitchen roll or natural sponge
Steps
Preparation
If your table is old, previously painted or varnished then clean thoroughly with sugar soap, then lightly sand it to give the table a key. The furniture paint can be used straight onto most surfaces but I always recommend a light sand with fine sandpaper for everything I paint.
If the table is heavily varnished or has lots of knots in the wood then I’d also recommend you use Zinsser B-I-N to stop any stains coming through the marble effect.
Paint the base
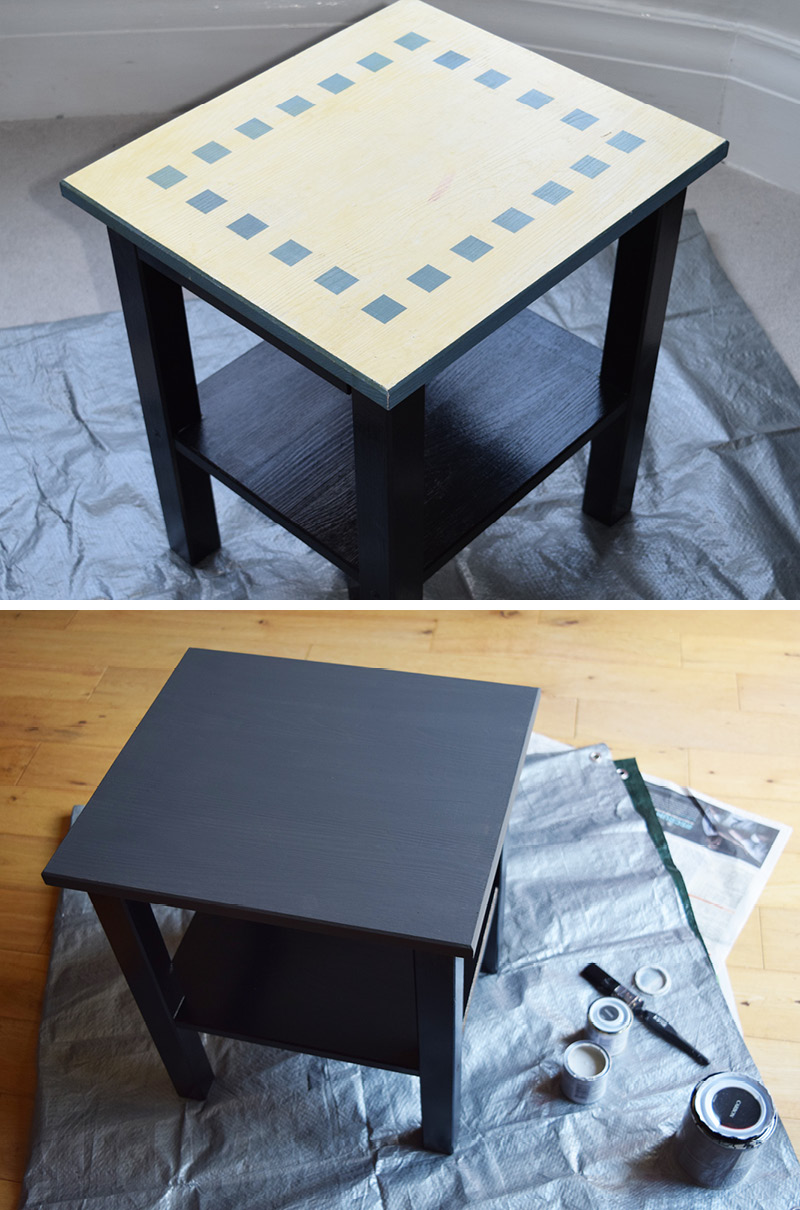
Paint the base of the table with 2-3 coats of Rust-Oleum Satin Finish Furniture Paint in Carbon, leaving each coat to dry fully in between. Then paint the base layer of the marble top in Rust-Oleum Chalky Finish Furniture Paint in Graphite.
Begin Marble base
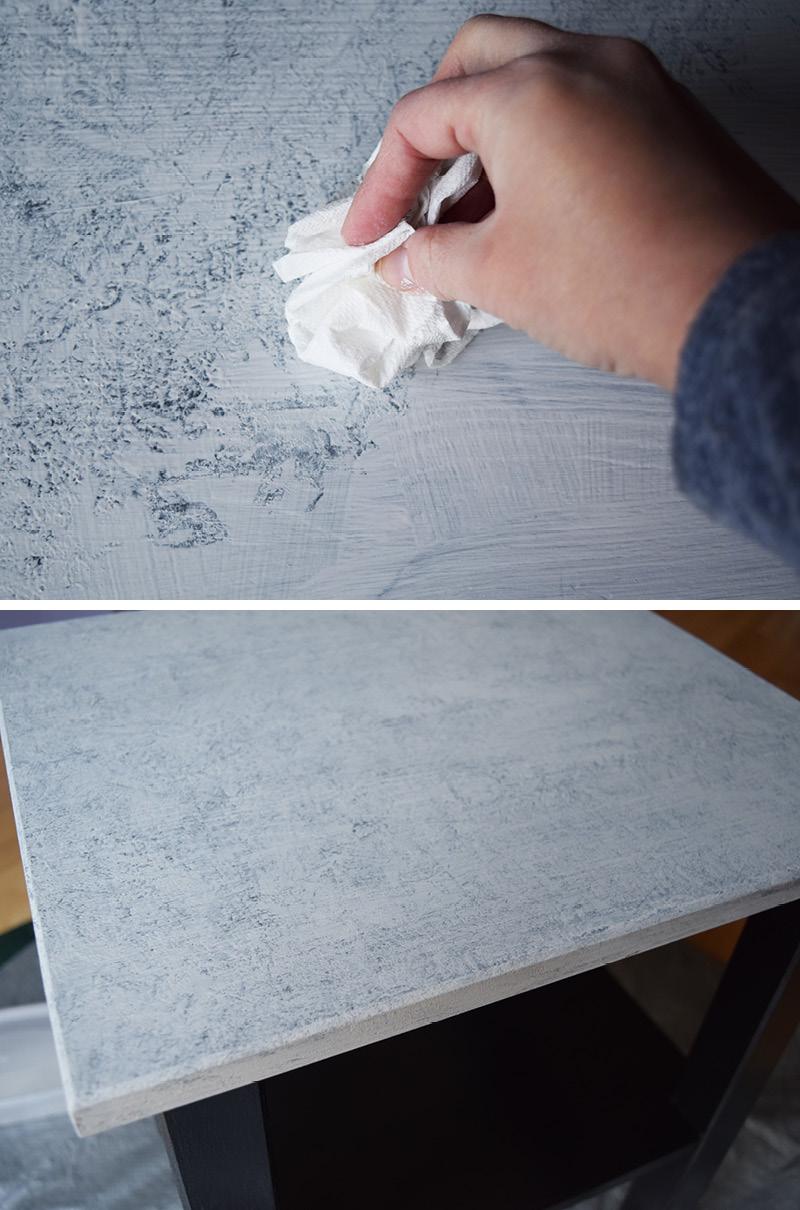
Once dry mix the Rust-Oleum Chalky Finish Furniture Paint in Winter Grey with a little water to thin the paint and paint a wash over the top of the base layer. While it’s still wet, lightly dab it off with either scrunched up kitchen roll or a natural sponge to give a dappled effect. Repeat this step to give a thicker coat of the Winter Grey but still allowing the Graphite to show through slightly.
Create Marble lines
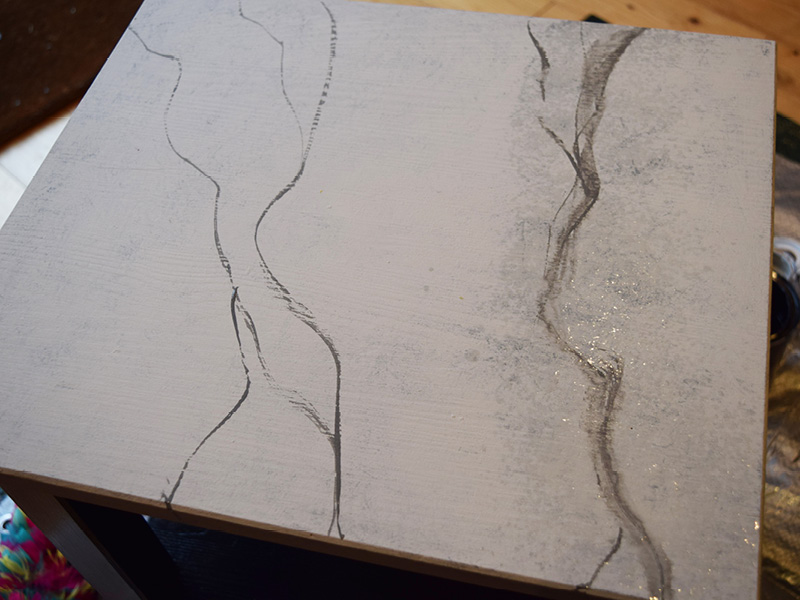
Mix a mid-grey using both of the chalky colours and using the fine artists brush, create your marble lines. Hold the brush lightly, twisting it as you go to give a slightly different effect.
While it’s still wet, use your spray bottle to lightly spray over the painted line, which will then cause the paint to spread slightly. You can then use the same brush to spread it out even further.
Layering the paint

Leave this to dry fully, it will take a little while to dry with the extra water on the surface. Once dry, use a bigger paint brush to lightly dab over the lines with the Winter Grey. This softens the effect of the lines without covering altogether. and again, lightly dab off any excess paint with scrunched up kitchen roll.
Final details
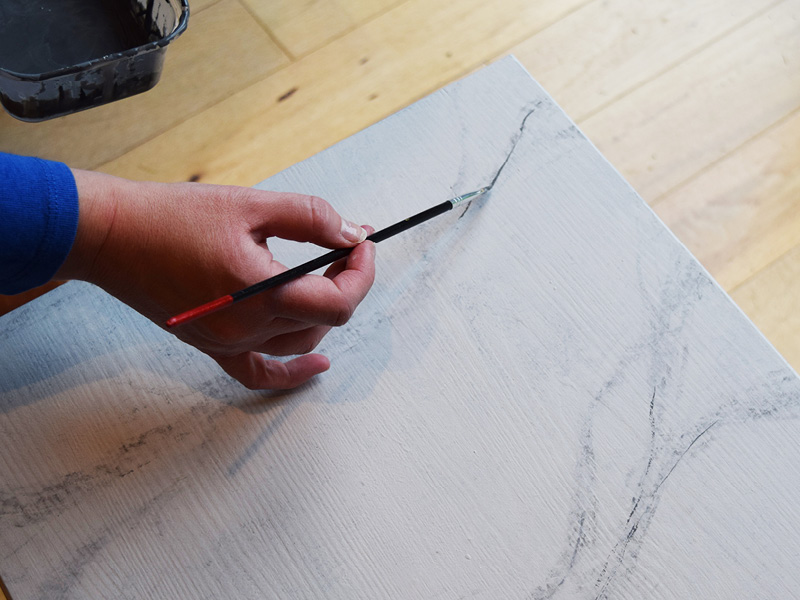
Using the fine brush, paint on the fine details with Graphite as in Step 4, using your first coat of marble lines as a guide.
Once fully dry paint two coats of Rust-Oleum Furniture Lacquer to protect the surface.
Tip 1. Natural marble lines run through the whole piece so make sure your lines flow onto the edges too for a more realistic marble slab look.
Tip 2. Try not to cross over the lines, natural marble veins run off each other but not through each other.