Menu

toggle menu
  • Home
  • Products
  • Inspiration
  • Lifestyle
  • How-to
  • Latest
  • About
  • Accessibility
  • Stockists
  • Contact
Home » How-To » HOW TO USE RUST-OLEUM CHALKY FINISH FURNITURE PAINT

HOW TO USE RUST-OLEUM CHALKY FINISH FURNITURE PAINT

Because chalky furniture paint is just so bloomin’ popular right now, it’s only right we show you how to make your own bespoke pieces.

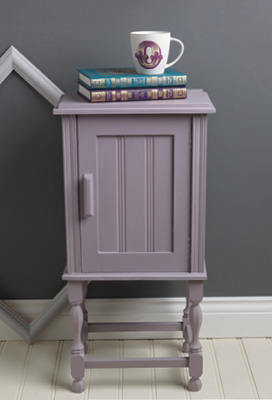
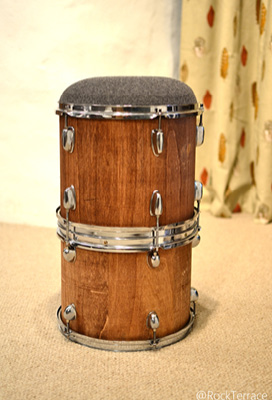
If you have any old and unique pieces of furniture that are perfect for upcycling but you’re not sure where to begin, you’re about to discover our simple step-by-step guide for becoming a master at creating the chalky, worn-look.

Rust-Oleum Chalky Finish Furniture Paint is one of the best ways we know to guarantee fine upcycling results. The paint will give your chosen furniture the luxury of a chalky, matt finish that’s intriguing, bang on-trend and the most show-offable thing you’ll own — we promise!

Okay, it’s time for us to stop nattering and for you to start perfecting the finish you’re looking for. Follow our easy step-by-step guide below…

What you will need

Item of furniture

Paintbrush

Clean dry cloth x 2

Fine sandpaper

Mixing sticks

Rust-Oleum Chalky Finish Furniture Paint — Colour of choice

Rust-Oleum Furniture Finishing Wax — Clear

Steps

  1. To prep your furniture correctly, it’s important you wipe down the surface with a clean dry cloth and remove any residue.

  2. Use the mixing sticks to stir Rust-Oleum Chalky Finish Furniture Paint thoroughly and ensure it’s mixed before applying.

  3. Use either a paintbrush or a roller and apply two to three coats to achieve an even finish.

  4. If you want to create the worn-look keep following the next steps…

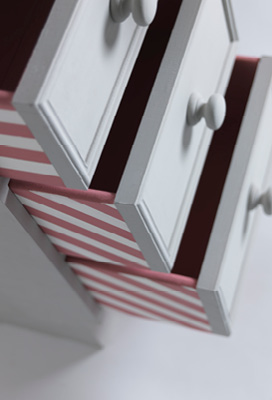
    Once fully dry, use fine sandpaper to distress detailed areas and add a shabby chic element to the piece of furniture.

  5. Wipe off any residue left over from sanding using your clean dry cloth.

  6. Use your second cloth and apply a coat of Rust-Oleum Furniture Finishing Wax to seal and protect the painted finish. We recommend applying in small circular motions for even coverage.

  7. Finally, take your first clean dry cloth and buff the surface to remove excess wax and achieve a soft sheen.

Sign up for our newsletter and get a free book of ideas.

Thanks for signing up, please Click Here to view the previous issues.

Share this

How-Tos

PT-Vase-LargeThumbnail

Sensational Statement Vase DIY

More >

Macrame-LargeThumbnail

HOW TO CREATE A HANGING MACRAMÉ PLANTER

More >

TerrazzoPots-LargeThumbnail

DIY Terrazzo Planters

More >

ShelfStyling-Stone-LargeThumbnail

Shelf Styling with Rust-Oleum Stone Paint

More >

View all

Inspiration

KEEP CALM AND PAINT YOUR BEDROOM

More >

SIX UNIQUE AND UNUSUAL CHRISTMAS WREATHS

Christmas can be filled with clichés if you’re not careful. We find the best way to get into the ...

More >

make an industrial statement with metallic gun metal

More >

Spotlight On Colour: MILLENNIAL PINK

More >

View all

Lifestyle

BEHIND THE BRUSH: MEET FURNITURE UPCYCLER ELIZABETH DOT DESIGN

BEHIND THE BRUSH: MEET FURNITURE UPCYCLER ELIZABETH DOT DESIGN

More >

BEHIND THE BRUSH: MEET INTERIOR DESIGNER, ROB FAWCETT

BEHIND THE BRUSH: MEET INTERIOR DESIGNER, ROB FAWCETT

In this month’s Behind The Brush interview, we’re getting to know interior designer and owner of Lighthouse Interiors ...

More >

BEHIND THE BRUSH: MEET SAM AND CATHERINE OF ROCK TERRACE

BEHIND THE BRUSH: MEET SAM AND CATHERINE OF ROCK TERRACE

More >

BEHIND THE BRUSH: MEET UPCYCLER, HELEN JOHNSON

BEHIND THE BRUSH: MEET UPCYCLER, HELEN JOHNSON

More >

View all
  • Products
  • Inspiration
  • Lifestyle
  • How-To
  • About
  • Stockists
  • Make it Yours magazine
  • Contact

Follow us

Rust-Oleum, Portobello Industrial Estate, Birtley, Chester-le-Street, County Durham, DH3 2RE
Tel: +44 (0)191 410 6611 Email: enquiries@tor-coatings.com
© Rust-Oleum 2025 Copyright. All Rights Reserved. 'Make It Yours' is a registered trademark. Privacy Policy | Terms & Conditions